Installing SnapEngage is a simple 4 step process.
1. Sign up.
Just enter your name, email, and password and that is all you need to sign up for SnapEngage.
2. Install the SnapEngage widget on your website.
Go into your configurator and the code should be the first thing you see. If for some reason you do not see it then at the top of the screen go under the "settings" tab then on the left side of the screen click on the "get the code" link. The code should look something like this:
Copy the code! Then on your page source paste the code just before the closing </body> tag in the html template of your site or every page where you'd like to provide SnapEngage.
Alternatively, click the "Send to Developer" button and enter your developer's email address in the "To" field then press send. Your developer will receive all of the instructions and code needed to set up the widget code on your website.
Installing the SnapEngage JavaScript on your site:


3. Select your settings in the configurator.
Agents:
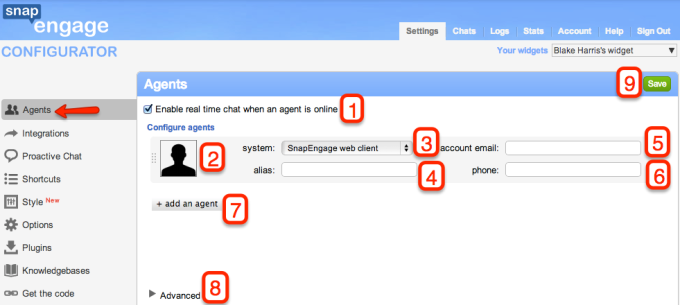
1. Keep this box checked to allow your agents to chat with your visitors.
2. Click this image to upload an agent photo.
3. Select which system you would like your agents to be able to chat from.
Your options are Google Talk, Skype, or the Web Client. Once you press SAVE your agent's using gtalk and Skype should receive 4 contact request which they can use to chat with their website visitors. If your agent does not receive the 4 visitor request then have them manually add them. Click here for how to manually add your Skype contacts and click here for how to manually add your gtalk contacts. If your agent is using the web client they should receive an email with how to get set up to log in. If they do not get the email then have them go here to retrieve their password: www.snapengage.com/reset and send them this article: http://help.snapengage.com/snapengage-web-client-introduction/
Click here for why we suggest the web client.
4. Alias is the name of the agent that will display to your website visitors.
5. Account email is the email address the agent will use to sign into their chat system. The visitor will not see this address.
6. If you would like your visitors to see the "call me" button and have the ability to place a call directly to the agent they are chatting with then enter the agents number here. If the phone number includes an extension type "xw" after the number and prior to the extension. For example 8556676268xw109
7. To add another agent simply click this button.
8. To see the advanced section of the agent's tab click this button. See below for a discussion on the advanced section of the agent's tab.
9. After you make any changes in the configurator click SAVE.
Agents-Advanced:
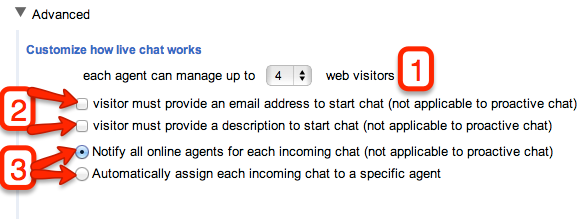
1. Each agent is allowed up to 10 chats at a time. However, we recommend no more than 3 at a time.
2. When a visitor clicks the CHAT button you can either have the chat start right away or show the visitor the pre-chat box. To have the chat start right away see the STYLE section below. If you would like to use the pre-chat form then when the visitor clicks the CHAT button they will be given a form to enter their email address and their question. You can require both, just one, or neither of these be filled our prior to the visitor starting a chat.
For rules regarding requiring an email address in proactive chat click here.
3. This option allows you to either notify all agents when a visitor contacts you from the CHAT button and thus have the first agent to respond take the chat or to automatically assign the chat to one agent.
For more about how chats are assigned see here.
Integrations:
In the Integrations tab you can decide if you want the chat transcripts and offline messages delivered to your email adress, or select one of our integrations by clicking on the relevant icons.
 |
 |
 |
 |
 |
 |
 |
 |
 |
 |
 |
 |
 |
 |
 |
|
 |
Proactive Chat:
For the Proactive Chat to pop up for your visitors, you can configure the settings here. See these two forum posts for more details: How to test if the Proactive Chat is working? and Proactive Chat URL rules.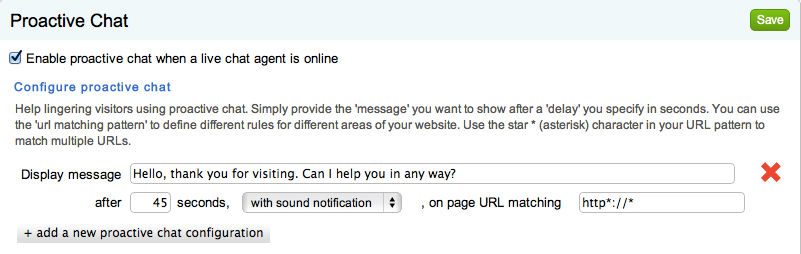
Shortcuts:
In the Shortcuts tab you can configure canned messages, so you don’t have to type the same message over and over again. You can also use this to configure shortcuts for our co-browsing feature using the goto command (e.g.: Shorten the ‘goto http://domain.com/products’ command to ‘g2p’) you can find more about setting these shortcuts here.
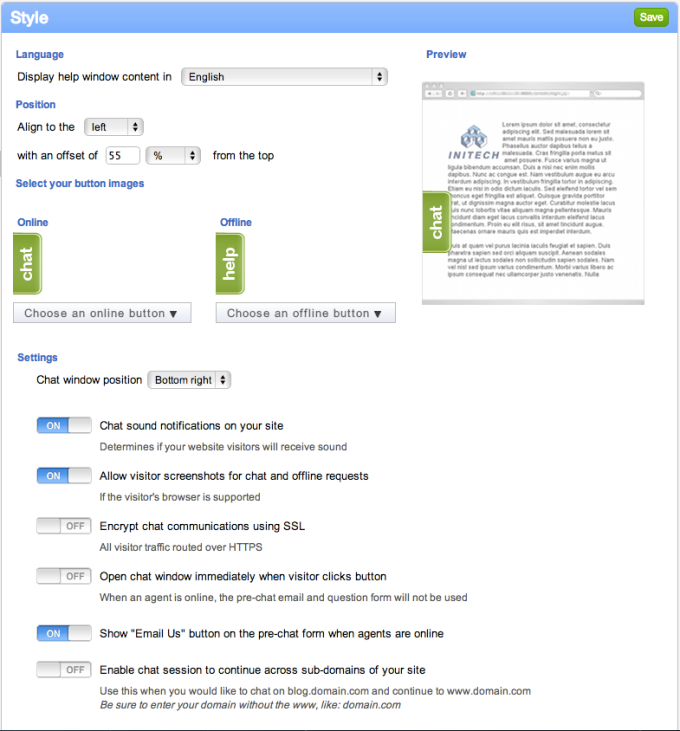
Style:
The Style section allows you to select the language that the help window will appear, the location of the help button, the image for both your online and offline button, as well as several other style options.
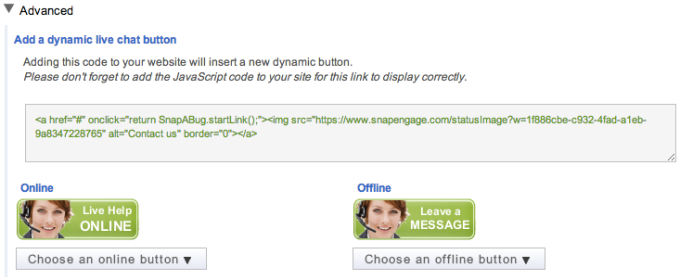
Style-Advanced:
To place a help button in a static position insert this code on your page source in the location that you would like the button to appear. You can select a different image for online and offline.
Options:
There are several options available to you in this tab. For more about how to set up the options section click here.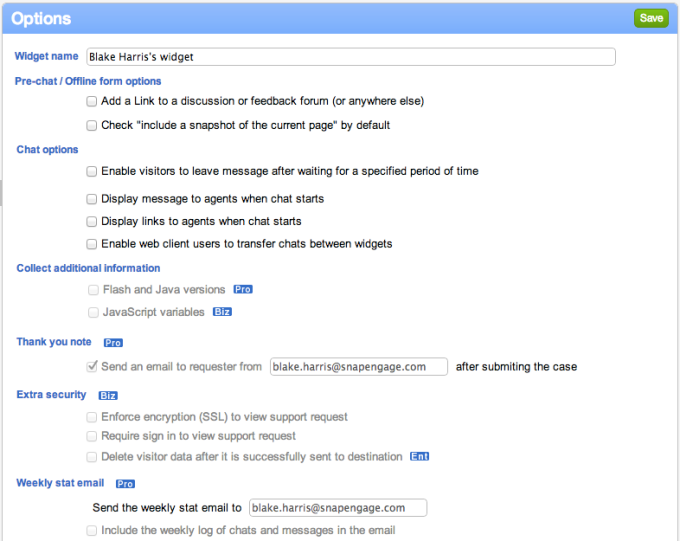
Plugins:
You can set your plugins in this tab by clicking the icon that you wish to plugin to, and following the relevant steps.
4. Log into the Web Client, gtalk, or Skype.
When logged into the web client, gtalk, or Skype the configurator will see you as available and will reflect your status on your web site, assigning chats to you on visitors' requests. If you have any other questions about getting set up come chat with us!
Comments